When you’re a home owner, you need somewhere to put all your tools as well as a nice work space. A workbench fits the bill perfectly because you can store items underneath it and use the top to work on.
If you’re building a particularly large workbench, you can also use the surface / top to place other tools like a vice, bench grinder or just a chop or band saw.
This post details the construction of the workbench I built for my garage. The one section is 12′ wide by 24″ deep and 36″ tall. The other section is 7.5′ wide by 24″ deep and 36″ tall. Both sections include a shelf.
First, you need to figure out how much room you have for your workbench. This will allow you to plan the amount of wood you need to purchase. In my case, I wanted to go 12′ on one wall and 7.5′ on the cornering wall. This actually comes out to 5.5′ of extra since 2′ of the second wall includes the first bench depth.
In the picture below, i’ve moved some things around (making more of a mess) and figured out the size.

I then purchased the wood I estimated and got started. First, I built the bulk of the first / long side. At this point I wasn’t entirely sure I was going to continue it on at the corner or not. You want to make sure you have everything level by using a quality level at least 3′ long. The longer the level, the more accurate and easy it will be to get a good reading. The front of the bench is supported by vertical 2x4s spaced about 4′ apart. I then put in supports about 16″ apart down the entire thing.
It is fastened to the wall with lag screws into the studs in the wall as well as some secondary supports also secured to the wall studs with lag screws. There’s a small soffit running along the base of the wall which prevented vertical supports to the floor on the wall side.

When I finished that part I was feeling pretty good about myself and decided to go ahead and build out from the corner along the wall. This would add additional storage and a nice spot for my band saw and vice.

The next step was to build the shelf. Careful planning goes into this step as you want to make sure you make it high or low enough to fit what you’re looking to keep there. For instance, it’s a popular idea to make them high enough for those Home Depot or Lowes 5 gallon buckets to slide under. Some people want to make sure the they can fit paint cans directly on the shelf, etc. Figure out what works best for you, and build your shelf.
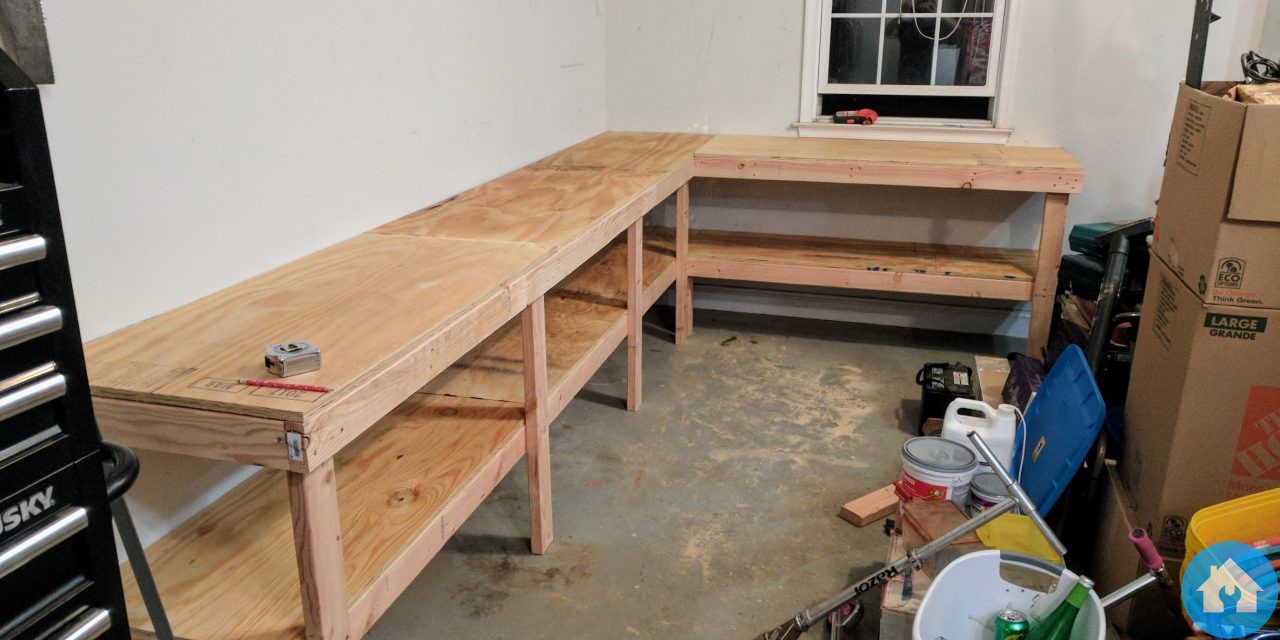
Building the shelf is just like building the top. You want to make it look like a ‘ladder’ so that there’s plenty of support along the whole thing. I didn’t take a picture of that of course, but here’s a shot with plywood on it. I went with 3/4″ non-sanded plywood.

The next step was to lay the plywood on the top. Again, 3/4″ non-sanded plywood. Being 24″ deep was nice because I could get the store to rip them ahead of time and utilize most of the sheets.

In my planning, I wanted to leave just enough room to slide my old craftsman toolbox next to the other side. You can see that in this picture..

Then, when you’re done – fill it up with everything you have! After filling mine up, I realized I should maybe move some of this stuff into the basement!

Time for a beer! Also, you’ll notice that I made a french cleat system. I’ll write up a post for that soon!
Let me know how your workbench project goes below in the comments!


Trackbacks/Pingbacks